
Fourth Armistice Blouse
January 23rd, 2013
Like evil minions in a science-fiction film, they just keep coming. Here, after more hours of hand-sewing, embroidering, and tatting than I care to count, is armistice blouse number four.
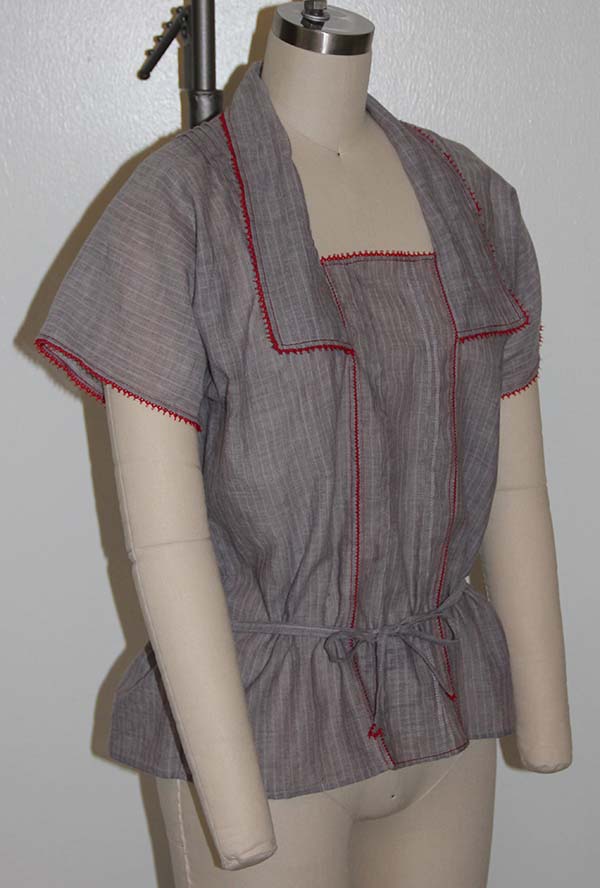
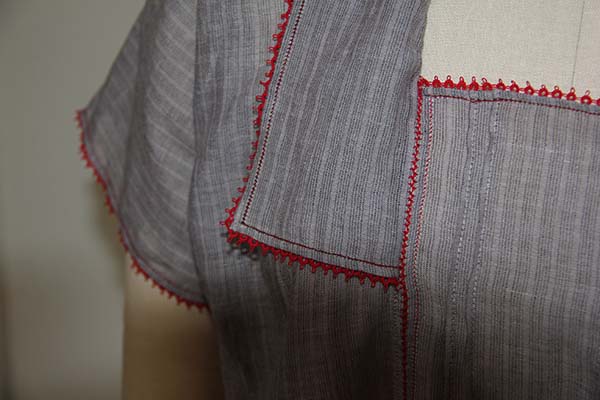
I measured everything perfectly this time, so all the edges have drawn-thread “handkerchief” hems in addition to the tatted lace and fagotting. I also widened and lengthened the collar.
As I’ve said before, this particular design is more of a nod to the late Edwardian style than an accurate reproduction. But I’ve discovered historical precedents for at least two of my modern modifications. It seems that kimono sleeves were a popular style for ladies’ shirtwaists as of 1913. And I found an original “armistice” style blouse from the late 1910s that uses four pintucks over the front shoulder to control fullness around the bust!

Because this is a pull-over (no historical precedent found for that yet — all the originals I’ve seen or looked at in pictures open with buttons on one or both sides of the center panel), I didn’t gather the waist. Instead, I’m using a self-fabric tie, complete with tatted tips, to give the required cinching. I believe the originals with gathered or tied waists were meant to be tucked into skirts…so the tie was never actually seen, just used to control the blousing above.
Version four is the first I’ve felt good enough about to offer for sale. I planned to make lots more just like it, and in different sizes too. But sheesh, this was just too much work. I’d have to charge a fortune. So it’s back to the drawing board, this time for some sewing shortcuts. In the meantime, you can buy this one-of-a-kind blouse for a ridiculously low price right here.
Gotta admit, I’m starting to itch for an authentic armistice blouse too. Maybe once I get the “modern” version perfected, I’ll have to give an historically accurate one a go too.
Third Armistice Blouse
January 3rd, 2013
Eek! What a terrible photograph. But I’m so tired of this blouse, I don’t care enough to take a better one.
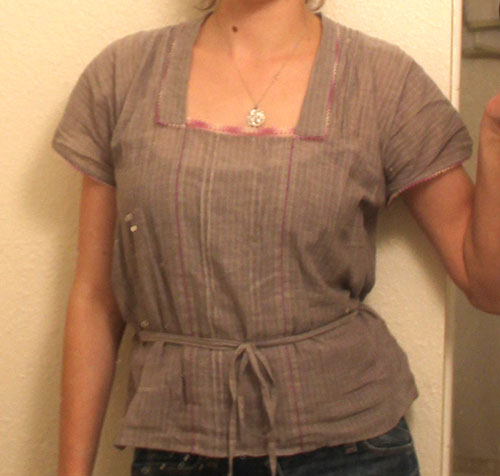
Like my second armistice blouse, this one sticks more closely to the early 20th-century form. It’s sheer grey striped cotton, with tatted purple ombre trim, and purple fagotting. I added a set of tiny tucks over each shoulder, which seems to help with the bagging around the underarms. I also fixed the collar issues suffered by the preceding blouse — mostly. I think I will use a piece of bias self-fabric to bind the curved part of the collar seam so I can clip it instead of madly stretching the allowance to fold and bind itself.
The fabric slipped as I was cutting it out, so I wasn’t able to incorporate the handkerchief hem that I used on the second blouse (you need to do that kind of work along a pulled thread). I think that extra line of embroidery added a lot to the feeling of delicacy, and I plan to be very, very careful cutting out the next edition. Without the handkerchief hem, the center panel also ended up a little too wide. So I whipped up a triple line of tatting and used it to pull in the neckline a bit. I really like the effect it adds, but am not sure I want to add any more work to what is already an incredible time consuming design…
Up next — the fourth (and possibly perfect) armistice blouse. Keep your fingers crossed.
Second Armistice Blouse
December 9th, 2012
Armistice blouse number two has much more in common with its early 20th-century inspiration style than my first attempt.

It’s completely hand finished — I used the machine only for the side seams (they are finished by hand with a faux French seam), attaching the collar, pintucking the front panel, and sewing the waist cord. The fabric is a nearly-sheer, thread-dyed cotton gauze pinstripe that I picked up on the clearance rack at Walmart, of all places.
In terms of basic shape, this blouse doesn’t differ much from my first try. It’s still got the kimono sleeves, though much shorter. I also shortened the length so it’s more of a shirt, less of a tunic. And I added the traditional collar. (Though my collar pattern, which began as square cut, a la middy, misfired by the time I decided to make it narrow and rounded. It doesn’t lay flat in the back, causing all sorts of unpleasant rippling.)

I also reverted to the utilitarian waist tie — on period examples I’ve seen, this tie is usually made from narrow twill tape, never meant to be seen. It contained the blouse’s fullness so it could be neatly tucked into a fitted skirt. Since I don’t intend to wear this blouse (at least not exclusively) with late-Edwardian skirts, I compromised with a self-fabric tie, top-stitched over a double pleat at center back, and held in place with thread loops at the side seams.

Hand finishing aside, what really took time on this version were the embellishments. They’re pretty restrained compared to some period examples, but I like the understated delicacy. The collar and sleeves are trimmed in tatted lace, made especially for the blouse by yours truly. The sleeves and center panel edges were handkerchief hemmed (a very basic drawn thread stitch). Then, in the case of the center panel, I used matching pink cotton floss to faggot the edges together. You see a lot of this in original garments, though not usually around the center panel, since that was left open on one or both sides. A front closure with scores of teeny tiny buttons meant you didn’t need to pull the blouse over your head, which is much harder to do when you’re wearing a corset…
For modern ease of wearing, not to mention my legendary hatred of buttonholes, I decided to make this an over-the-head style. Version three is already underway. I’m going to adjust the fit a little under the arms, and add pintucking over the shoulders as well, in an attempt to contain some of the bagginess around the bust. And I need to figure out the whole collar thing too. I’m also thinking about doing a little tatted motif to set into the front panel. We’ll see how ambitious I get.
First Armistice Blouse
December 6th, 2012
To be honest, I don’t really know when or why this early 20th-century blouse style came to be called “Armistice.” It’s probably due to their great popularity during World War I. Whatever you call them, I think these delicate blouses are the perfect blend of Edwardian elegance and art nouveau flair.

I don’t have a picture of a period Armistice blouse handy, but you can easily find one on Google if you aren’t already familiar with the form (recently re-popularized by Downton Abbey). There’s also a classic Folkwear pattern for the Armistice blouse style. It’s reviewed here, on one of my favorite blogs.
My first attempt is rather deconstructed. I kept the basic bodice front, with an inset panel forming the trademark square neckline. I also included a waist tie, though mine goes backwards instead of forwards (originally, the tie was meant to contain the blouse when it was tucked into a skirt). I left off the collar though, and cut it with kimono sleeves. And, since it’s so loosely fitted, I didn’t bother with a front side opening.
It’s incredibly comfortable to wear, and was pretty darn easy to put together. I didn’t even make a pattern. Just measured and cut. But now that I see it in a picture, I have to admit it does project a certain frumpiness…the next version is already underway, and should be much more delicately styled.
Oh, and once I get it right, I intend to make enough to share! They’ll be in my newly opened Etsy shop. Yes, I too have succumbed.
A Little Tatty
December 5th, 2012
No pictures yet of my recent love affair with the armistice blouse, but here’s a sneak peek in the form of tatted edging.

This is the collar that will soon be attached to my latest blouse. You can’t see it terribly well in the picture, but the fabric is a nearly sheer white with pale grey pin stripes. I used pink cotton for handkerchief hemming and fagotting, so naturally had to whip up a few lengths of pink tatted edging to match. It’s an embarrassingly simple pattern (I have yet to quite master the whole two-shuttle thing), but at least it works up relatively quickly.
And it’s such fun taking my tatting around with me. Everyone is always curious about what I’m doing.

According to some histories I’ve read, tatting was developed centuries ago by nuns. Is it just me, or was all needlework developed by nuns? They say it caught on in the European courts when the ladies in waiting (always eager for something tasteful to pass the time) discovered how well tatting showed off their taper fingers* as they tied all those teeny knots. Elaborate and richly decorated shuttles of precious metal or ivory were de rigueur up through the Victorian era. I purchased a reproduction sterling silver filigree shuttle myself a few years ago, but was dismayed to find it stained my thread with tarnish. Perhaps a bath in lemon juice…
But really, it’s easier to stick to the mid-20th century metal ones, with their handy little bobbins that pop in and out. They even have a hook on the end for picking up the picots — though I find it works much better with a crochet hook. My absolute favorite shuttle is red plastic, without a separate bobbin (they can sometimes unwind at inconvenient moments) but I can’t seem to put my finger on its present location.
*Taper fingers is a ridiculously overused, semi-erotic 19th-century phrase — sort of the “heaving bosoms” or “throbbing member” of a more decorous time. For example, from Tom Cringle’s Log, circa 1832: “Then again—as I praised his lovely taper fingers—they were more like bunches of frosted carrots, dipped in a tar-bucket, with the tails snapt short off…”