
The Not So Humble Apron
April 17th, 2013
For the past few weeks, I’ve been helping to install an exhibit of aprons (1880s-1970s) at the South County Historical Society. My job was purely technical — I did some minor wet cleaning, applied plenty of gentle steam to get the wrinkles out, and hand-sewed twill-tape supports until I was cross-eyed (thanks heavens I wasn’t alone on the steaming or sewing). But it got me thinking about aprons.
Of course, the primary point of an apron is to cover up — and often to protect — your clothing. They were (and are) worn by men and women alike, in different configurations according to the task at hand. But aprons weren’t always a matter of simple utility. From centuries past, right up to the 1960s, wealthy women — who never had to lift a finger for housework in their life — regularly wore “dress aprons” as part of their “at home” ensembles. Whether receiving guests in an 18th or 19th century parlor, or mixing cocktails for her husband’s office party, the well-dressed woman donned a frilly apron-shaped confection as a symbol of her domestic dominion.
“You will think I am dreaming when I tell you that a great many ladies have resumed aprons. This fashion is both graceful and convenient : it gives the toilet an air of simplicity which agrees well with le coin de feu…an air of delicate coquetry that is by no means to be disdained.”
The Ladies’ Companion, 1860
Dress aprons appeared frequently in fashion plates, like this one from Godey’s, as well as in the work table department of ladies’ magazines with diagrams for cutting and construction.
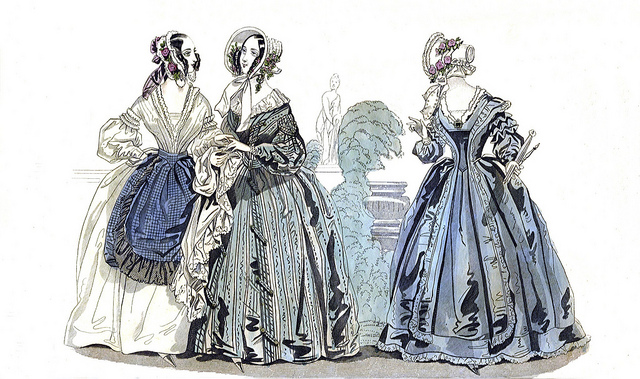
DESCRIPTION OF FASHION PLATE.
FIG. 1. – Muslin morning dress, made high in the neck. The corsage is a surplice shape, with bishop sleeves. Apron of plaid silk, trimmed with black lace. Muslin morning cap, trimmed with flowers. The tout ensemble of this dress is remarkable for its simplicity and beauty.
Godey’s Lady’s Book, October 1840; Philadelphia, PA.
Notice the decorative apron on the left? “Morning dress” was meant to be worn in the home, perhaps while receiving visitors making “morning calls,” which, ironically, were never made until afternoon. These formal 19th-century aprons often boasted elaborate decorations — I’ve seen one quite covered in silk-ribbon embroidery — and high, shaped waistbands supported by small pieces of whalebone.
APRONS
If for common use, aprons are made of white, brown, blue, black, or checked linen, of black stuff, calico, Holland, leather, nankeen, print, or long cloth ; if for better purposes, of cambric muslin, clear mulled, or jaconet muslin, silk, satinette, satin, &c. The length of the apron is, of course, generally determined by the height of the wearer, and the width, by that of the material, and by the purpose for which it is intended. For working aprons, the width is generally one breadth of a yard wide ; for dress aprons, two breadths, one of which is cut in half, and these halfs put one on each side of the whole breadth. If the material should be wide enough, one breadth, of from fourteen to twenty nails, will answer very well.
The Workwoman’s Guide, by a Lady; 1838, London.
There was also a distinction made between servants’ aprons that were meant to get dirty — worn while cooking, cleaning, or emptying the slops — and aprons that were meant to be seen.
“Before dinner is served she [the maid of all work] should again wash her hands and change her apron, making her dress as seemly as the nature of her employments permit.”
An Encyclopaedia of Domestic Economy, by Thomas Webster & Mrs. William Parkes; 1855, New York.
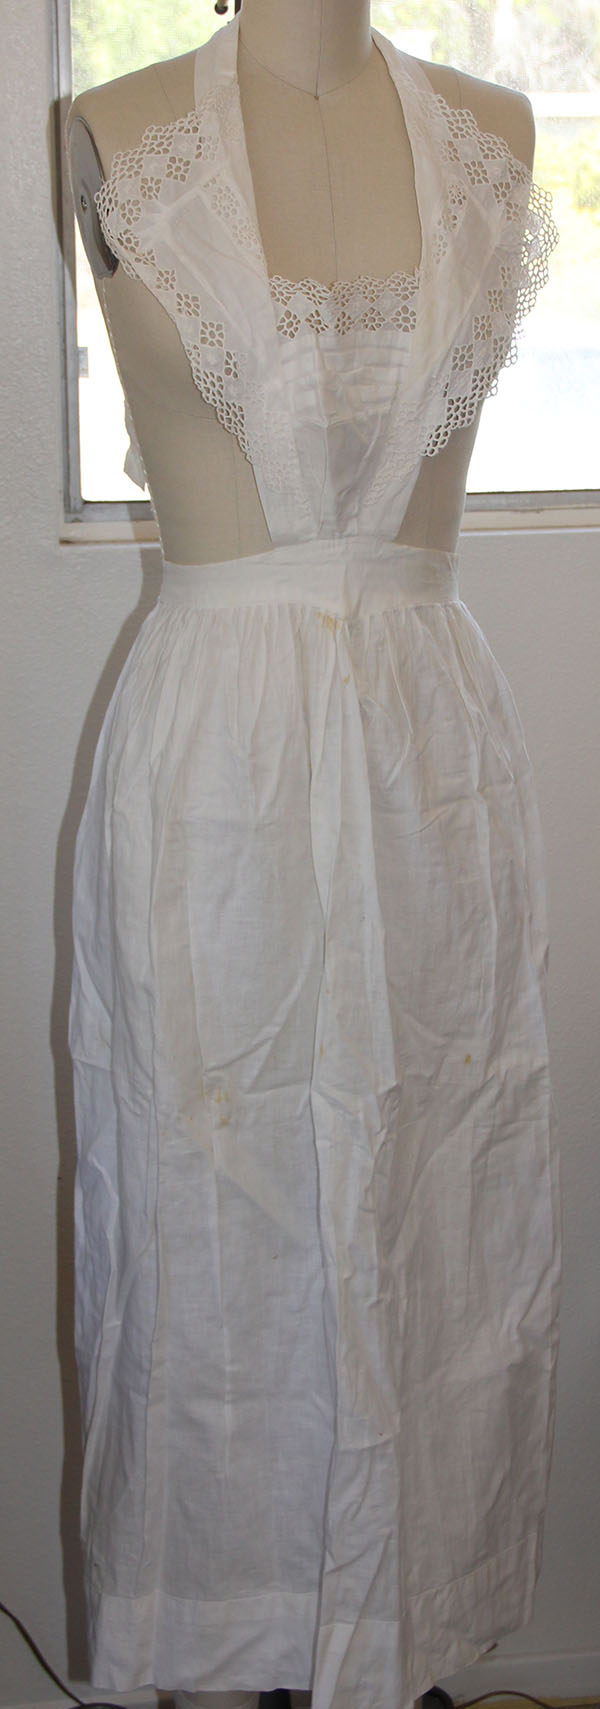
By the end of the 19th century, servants’ better aprons had become very formal indeed. Take this one for example. It belonged to someone in my maternal grandmother’s family — though as far as I know, none of them were ever in service.
I also have a number of aprons — both utilitarian and otherwise — that belonged to my grandmother herself, from 1940 through the 1970s.
Dresses on Display
March 13th, 2013
In a shameless plug for the South County Historical Society, where I volunteer as curator of textiles, here’s a peak at the dresses currently on display. If you’re in the Central Coast area, why not drop by and see them in person? Hurry, because we’re about to change the exhibit in the next month or so. They’re in the back room at Heritage House, in old Arroyo Grande Village. The museums are open Saturday & Sunday afternoons, and admission is free!
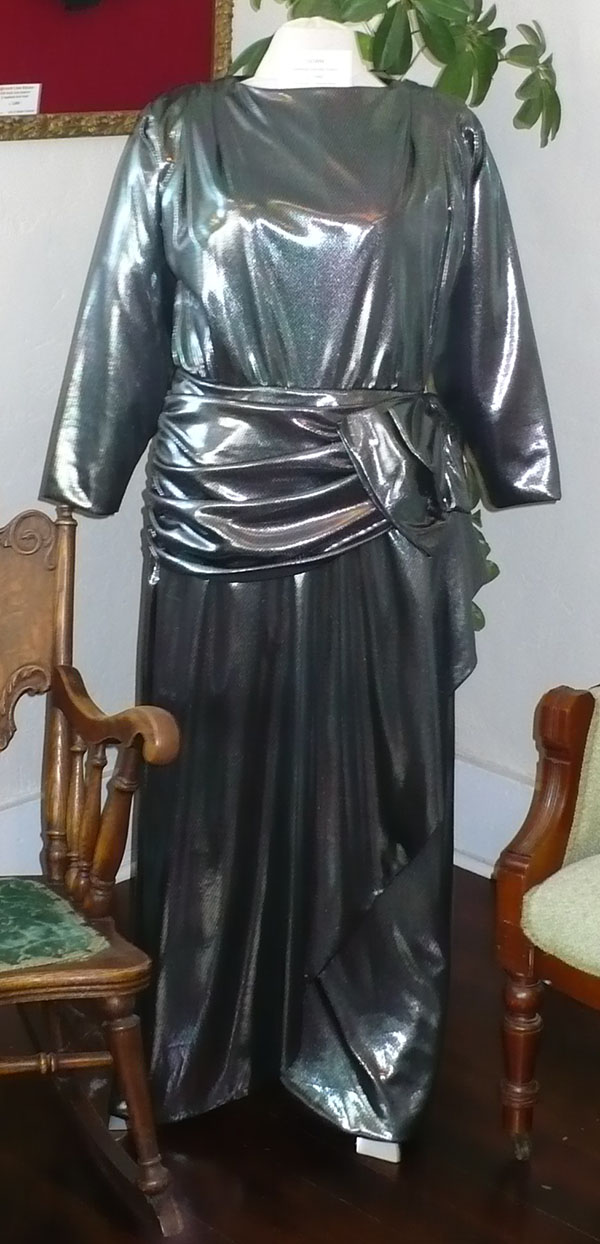
Working backwards, there’s a stunning (in more ways than one!) gown from the 1980s, made by a local seamstress…
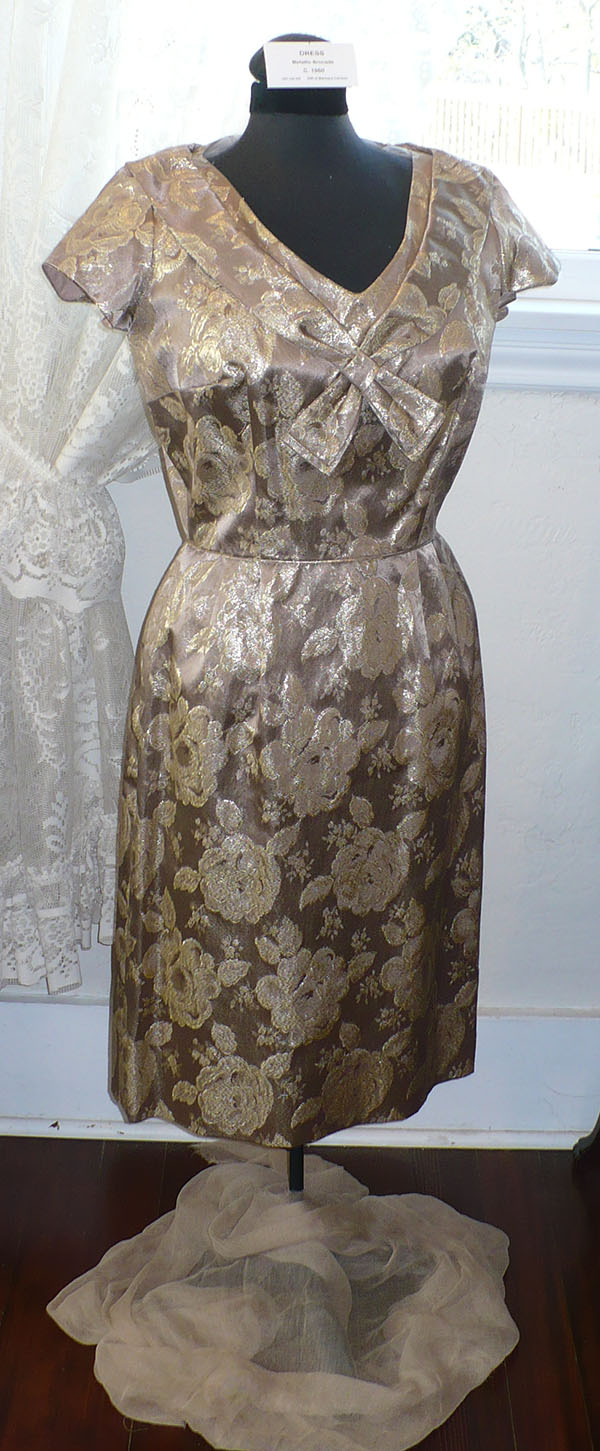
An adorable gold cocktail confection from the 1960s…
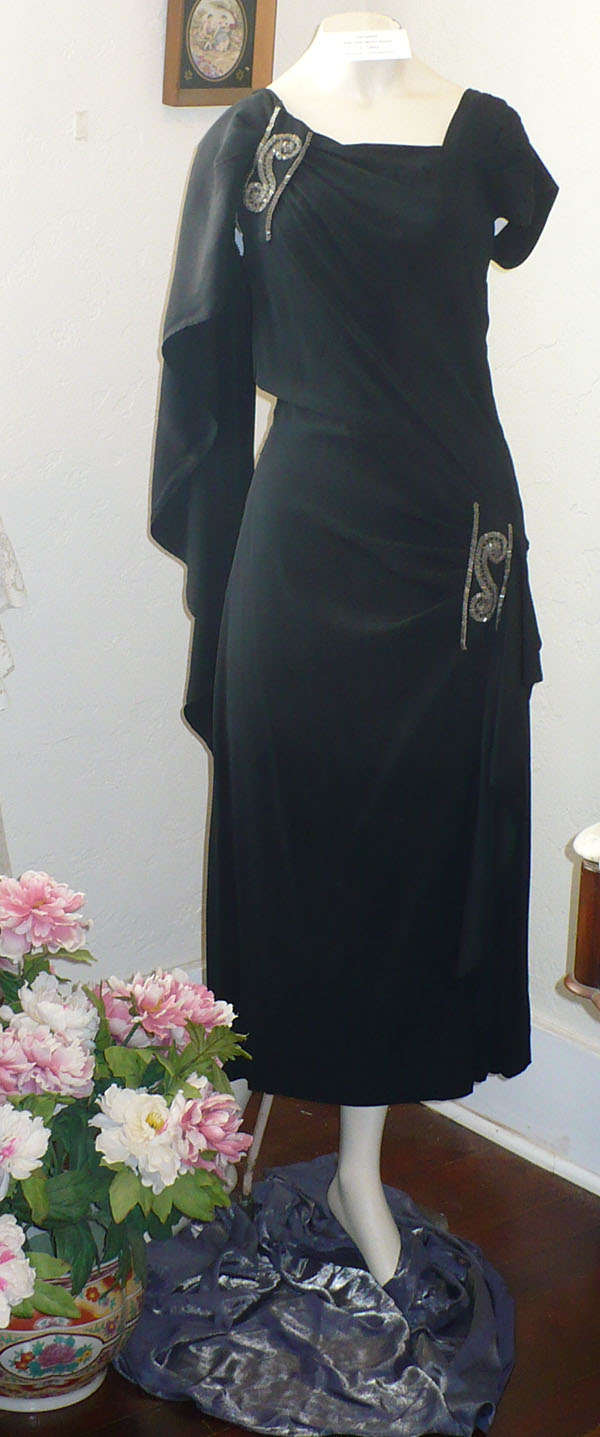
A slinky black evening number with silver beading from the 1940s…
And my favorite — a stunning black silk frock with metallic braiding from the 1920s. I’m particularly proud of the gently shaped arm supports I constructed out of wire, polyfil, and stockinette. I also had to contrive an interior skirt support from the waistband to the mannequin’s shoulders to preserve the bloused effect and prevent the heavy hem from damaging the relatively delicate bodice lining.
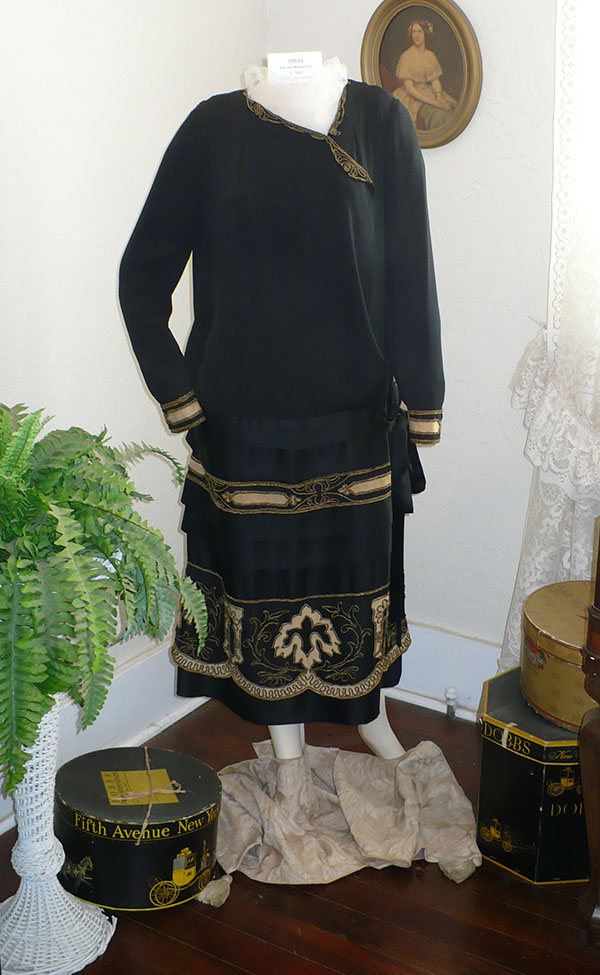
Don’t you just love the coordinating hat boxes and fern too? Those are courtesy of Joe, designer in residence at the SCHS.
*I don’t usually post about my work at the Historical Society, since most of it is rather repetitive (unless you really, really like brushing textiles), and conflicts of interest abound when it comes to sharing pictures of the objects on the internet. But since these dresses are already on public display, and I really want you to go visit them, I figured it would be okay to make an exception!
Fourth Armistice Blouse
January 23rd, 2013
Like evil minions in a science-fiction film, they just keep coming. Here, after more hours of hand-sewing, embroidering, and tatting than I care to count, is armistice blouse number four.
I measured everything perfectly this time, so all the edges have drawn-thread “handkerchief” hems in addition to the tatted lace and fagotting. I also widened and lengthened the collar.
As I’ve said before, this particular design is more of a nod to the late Edwardian style than an accurate reproduction. But I’ve discovered historical precedents for at least two of my modern modifications. It seems that kimono sleeves were a popular style for ladies’ shirtwaists as of 1913. And I found an original “armistice” style blouse from the late 1910s that uses four pintucks over the front shoulder to control fullness around the bust!

Because this is a pull-over (no historical precedent found for that yet — all the originals I’ve seen or looked at in pictures open with buttons on one or both sides of the center panel), I didn’t gather the waist. Instead, I’m using a self-fabric tie, complete with tatted tips, to give the required cinching. I believe the originals with gathered or tied waists were meant to be tucked into skirts…so the tie was never actually seen, just used to control the blousing above.
Version four is the first I’ve felt good enough about to offer for sale. I planned to make lots more just like it, and in different sizes too. But sheesh, this was just too much work. I’d have to charge a fortune. So it’s back to the drawing board, this time for some sewing shortcuts. In the meantime, you can buy this one-of-a-kind blouse for a ridiculously low price right here.
Gotta admit, I’m starting to itch for an authentic armistice blouse too. Maybe once I get the “modern” version perfected, I’ll have to give an historically accurate one a go too.
HSF #1: Bi/Tri/Quadri/Quin/Sex/Septi/Octo/Nona/Centennia
January 13th, 2013
I wasn’t sure I was even going to participate in the first official Historical Sew Fortnightly challenge. To be honest, I don’t really have an affinity for any years ending in 13. Most of my historical fashion obsessions seem to spring from the historic houses at which I have worked. Turn of the century, yes — I’ve done Edwardian and Federal/Regency/Empire — but I’ve never made it into the teens.
It was a 1913 cutting diagram from the introductory materials in Janet Arnold’s Patterns of Fashion II that finally sold me. A description on Dressmaking Research caught my eye, and seemed to jive with the Arnold diagram.
“Skirts cut in two pieces have proved so well liked that they are one of the most often remarked models in the suit or separate skirt. No. 6658 is the newest design with just the desired width. The possibility of sloping the front edges away at the foot is appreciated, for some women like the added freedom it allows in walking. In the medium size the lower edge measures about one and five-eighth yards. There is a slightly high or a regulation waistline fitted with scant gathers or darts. The skirt may be closed at back or front and finished in round or shorter length. Serge, cheviot, wool rep, whip-cord, broadcloth, homespun, suitings, linen, pique and agaric are the materials suggested.
“A woman of medium size requires two and five-eighth yards of material thirty-six or more inches wide, Thirty-six inches is the narrowest width that may be successfully used because the model is cut in only two pieces.”
Designer, March 1913
So with brave heart and steady hand, I chopped into a length of green-and-white textured houndstooth of indeterminate fibre content (thrift store find) and started draping. The result is a little iffy, but not terrible for a first draft. I really like the two-piece construction: a pair of identical sections, each comprising half of the front and back, with a dart over the side hip and darts or gathers fitting the waist. It lends itself beautifully to the pegged tops, draping, and cross-overs that were popular in the teens. It’s also just fine as a plain walking skirt.
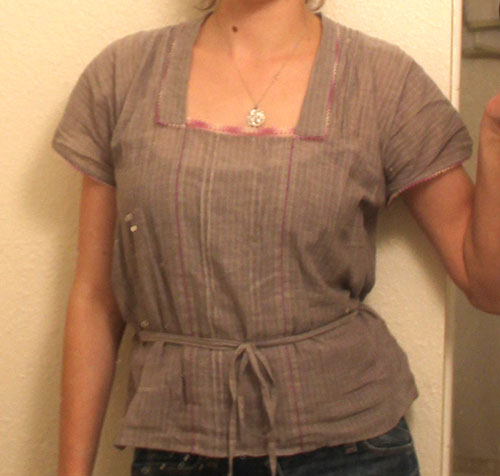
Unfortunately, a couple of late night cutting mistakes combined with fabric that refused to dart properly (wool will work MUCH better) add up to a skirt that doesn’t quite scream 1913. But it passes. With my second armistice blouse, plus 1930s hat and gloves thrown in, it’s surprisingly credible. Especially since I haven’t a stitch of teens underwear to help with the shaping.

Notice the wrinkles and flabbiness around the hem? They wouldn’t iron out, no matter how long and hard I pressed, nor how many vile chemical smells emanated from the heated fabric.
Here you can see my dirty little secret — the majority of the skirt’s fullness ended up in the back. These gathers are a little more than scant — shades of Edwardianism, gasp! But I think I can fix it next time by moving the side darts and using more conducive fabric. Can you tell I’m eager to explore this pattern more? And maybe even create a modern version to accompany my updated armistice blouses…

The only part of this skirt that really makes me happy is the waistband.
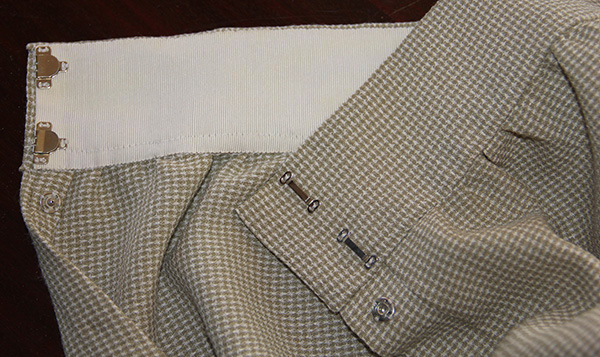
It provided one of those costuming “ah ha” moments when you suddenly realize that you’ve created something that looks just like a technique seen on extant garments but never properly understood. Lots of late-19th and early-20th century skirts have self-fabric waistbands faced with grosgrain ribbon. It’s a neat trick, creating a strong band without too much bulk. Common sense told me to sew the skirt to the ribbon first. Then I machine-stitched the fabric waistband to cover the join, turned the top and side edges under, and blind-stitched it to the ribbon. The result mimics period waistbands perfectly, right down to the line of machine stitching along the bottom of the ribbon!
Just the facts, Ma’am: 1913 Two-Piece Skirt
The Challenge: #1: Bi/Tri/Quadri/Quin/Sex/Septi/Octo/Nona/Centennia
Fabric: Textured Green & White Houndstooth, unknown fibre content (thrift store find)
Pattern: Custom draped based on cutting diagram in Patterns of Fashion II
Year: 1913
Notions:5 metal snaps, two waistband hooks and metal eyes.
How historically accurate is it?Hardly. Let’s call it more historically inspired. The silhouette is close-ish in a generic sense, but definitely no cigar. I need to do a LOT more research (and make some underwear) before I can feel confident calling anything I make from the teens historically accurate. I did use all period techniques — no zig-zag stitch, plenty of hand-finishing, etc. The material itself is some modern abomination, but the metal closings are pretty much accurate.
Hours to complete: Less than 10. Which is probably a speed record for me! What a difference a sewing machine makes.
First worn: This afternoon, to take photos. I briefly considered taking it out for a neighborhood stroll, but a rare California cold snap kept me huddled indoors. Thanks to a teensy cutting mistake (where I ignored seam allowances at the center front), I probably won’t be wearing this very often until the approach of bikini season inspires me to lose a little weight.
Total cost: $2.5o for thrift store fabric. The fasteners were inherited.
Third Armistice Blouse
January 3rd, 2013
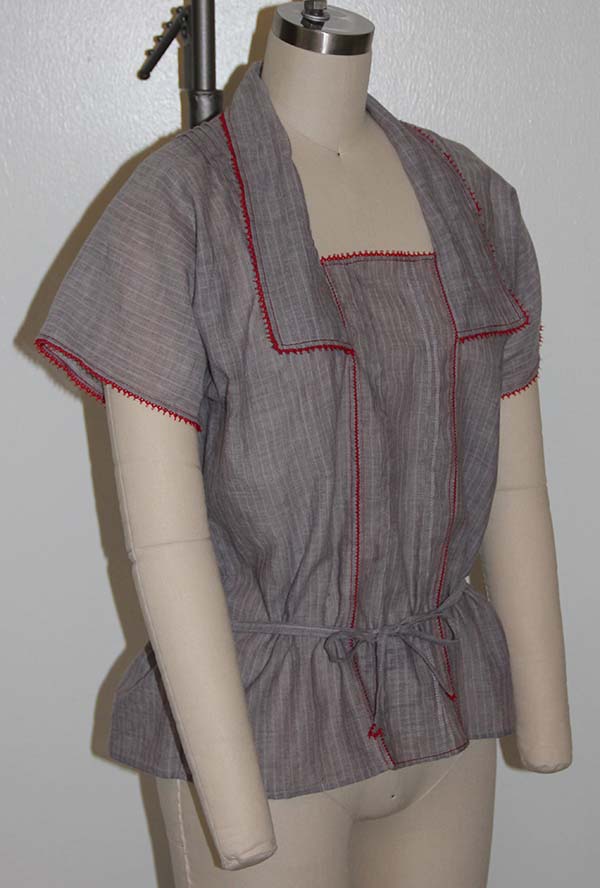
Eek! What a terrible photograph. But I’m so tired of this blouse, I don’t care enough to take a better one.
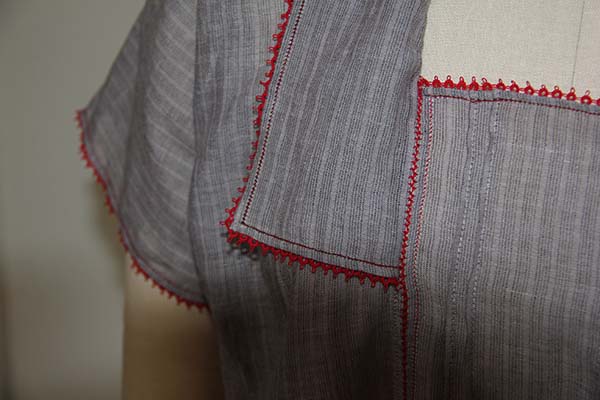
Like my second armistice blouse, this one sticks more closely to the early 20th-century form. It’s sheer grey striped cotton, with tatted purple ombre trim, and purple fagotting. I added a set of tiny tucks over each shoulder, which seems to help with the bagging around the underarms. I also fixed the collar issues suffered by the preceding blouse — mostly. I think I will use a piece of bias self-fabric to bind the curved part of the collar seam so I can clip it instead of madly stretching the allowance to fold and bind itself.
The fabric slipped as I was cutting it out, so I wasn’t able to incorporate the handkerchief hem that I used on the second blouse (you need to do that kind of work along a pulled thread). I think that extra line of embroidery added a lot to the feeling of delicacy, and I plan to be very, very careful cutting out the next edition. Without the handkerchief hem, the center panel also ended up a little too wide. So I whipped up a triple line of tatting and used it to pull in the neckline a bit. I really like the effect it adds, but am not sure I want to add any more work to what is already an incredible time consuming design…
Up next — the fourth (and possibly perfect) armistice blouse. Keep your fingers crossed.
Older Posts »