
HSF #3: Under it All
May 14th, 2013
Boy is this a belated post. The deadline for this challenge was February 11. That’s MONTHS ago. Oops. But here it is in the spirit of better late than never (when you try to juggle as many things as I do, this becomes one of your favorite phrases)…
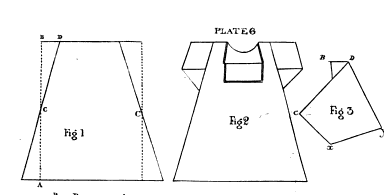
I made a early-mid-19th century shift exactly by the book. That is, following the directions in the Workwoman’s Guide (1838) to the letter. I mostly used the written directions and measurement charts, but it’s nice to have illustrations for reference as well, like plate 6, shown here. Don’t worry if you can’t find the illustrations when you read the Guide on Google Books — they’re all at the end.
After a little hesitating, I decided to break into my stash of NYC linen. I selected a piece with a fairly loose weave — not at all historically accurate, especially since the warp is made of much tinier threads, throwing the balance completely off. But it seemed like the best approximation of the “stout linen” recommended for shifts “for poor children.” (I realize that makes no sense at the moment, but I’ll explain what I’m working on eventually.)

The fabric was 60 inches wide, give or take a few after I shrunk it twice, so I was able to cut it in half and scrape out enough to make two shifts in the “first size” (aka smallest) with a single length. I cut it “to a thread,” which is the laborious process of pulling out a thread and cutting along the empty line to make sure you stay on grain — alas, linen cannot be torn like cotton. Then folded my length of fabric at the shoulder and basted up the selvedges so they’d stay together as I cut off the gores (see figure 1).
I was reminded how tricky gussets can be when you’re sewing and felling. I’ll admit here that I completely messed up the first sleeve. A quick refresher from a selection of mid-19th century sewing manuals helped me get the second sleeve nearly perfect.

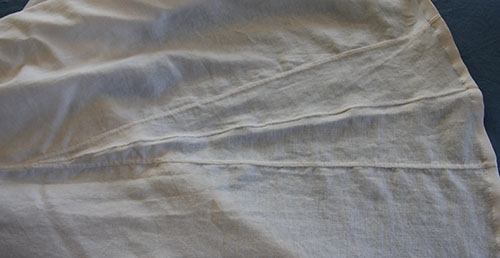
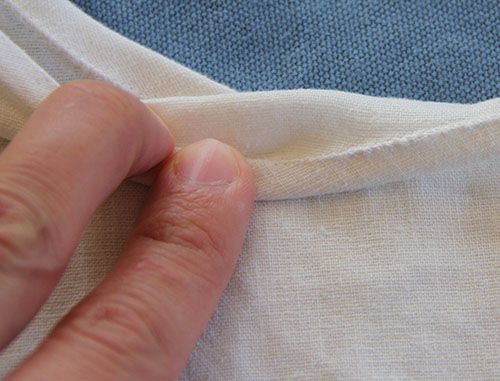
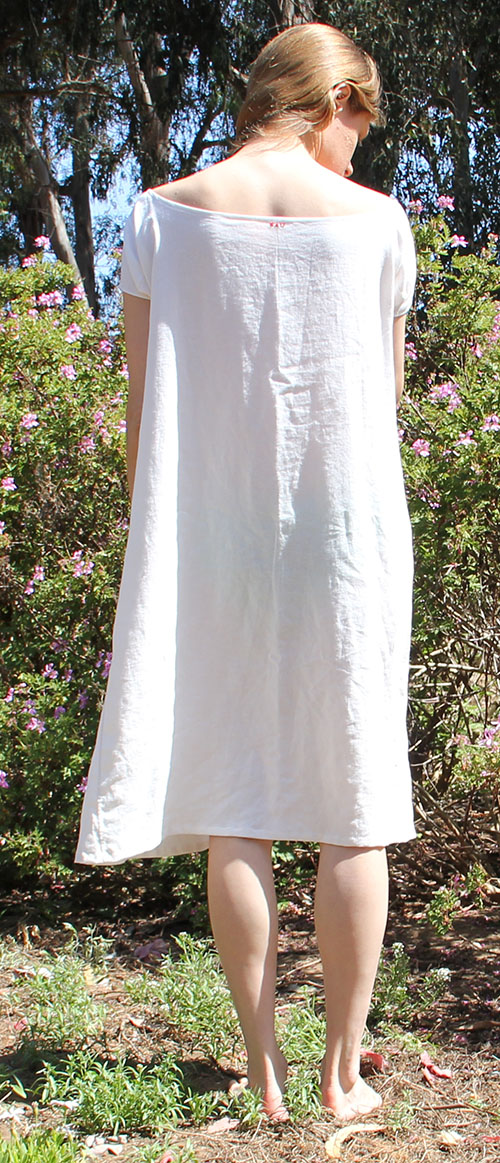
Once I’d cut out all the pieces — which was pretty easy since they were just rectangles — it went together very quickly. The edges were simply hemmed, with the exception of the neckline, which got double-turned and sewn for extra strength.
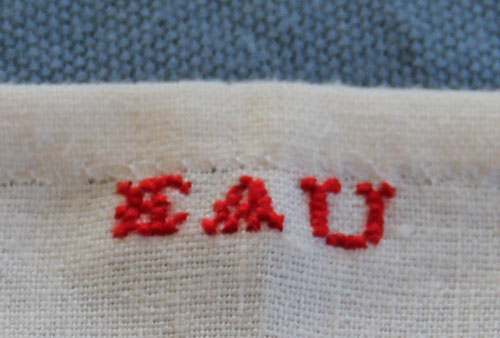
I forced myself to mark the shift at the back neckline with red embroidery thread. Workwoman’s Guide doesn’t mention ink in its section on marking, so I gritted my teeth and made with the magnifying glass. I opted for only my initials since using the current year would look funny, and it didn’t feel right to lie about the year either. I mean, with all that hand-sewing and accurate construction, it might get mistaken for an antique, right?
I was a little nervous about making the smallest size. I mean, I may be fairly trim for a 21st, century person, but I’m also half a foot taller than the average woman of 1850 and probably have a bigger — or at least longer — bone structure overall. I did end up adding 4 inches to the length, figuring that’s about how much extra length is in the part of my body covered by the shift. To my surprise, the shift is actually quite roomy. With the exception of the sleeves, which JUST fit my not-particularly-muscular upper arms.
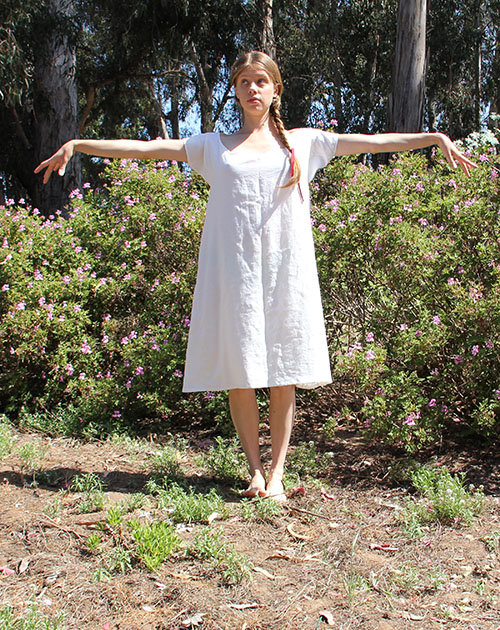
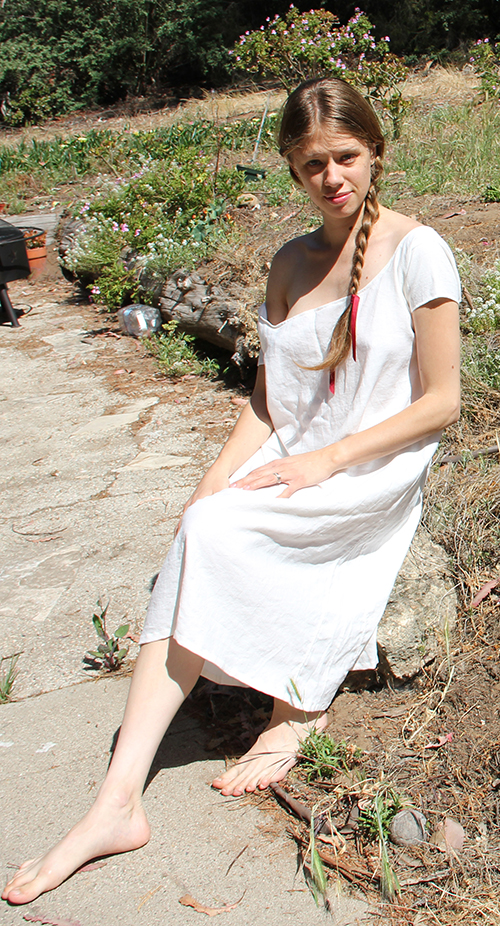
The neckline is especially large. At first I thought I’d made a mistake. But my measurements were perfect. And then I thought there might be a drawstring coming later on in the directions. But nix on that as well. So I am left with three possibilities.
- Women in the mid-19th century were universally better endowed than myself (which isn’t surprising considering what I’ve noticed in the early 21st century).
- They made all their clothes really big because repeated washday boilings were bound to shrink them considerably.
- It’s time to reevaluate the way I interpret “fit” of historic undergarments.
Number 3, while it may seem unlikely, and definitely involves eating at least a sliver of humble pie, does fit with my experience recreating the Regency apron-front dress from Janet Arnold’s Patterns of Fashion I. It’s also supported by some of the paintings I’ve been working from for my latest project. And here I thought the artists were being salacious by portraying women with their shifts falling off their shoulders. But maybe they just slipped on their own…
Just the facts, Ma’am: Workwoman’s Guide Shift
The Challenge: #3: Under It All
Fabric: 60″ wide hopelessly modern linen with an unbalanced weave
Pattern: From the written directions and diagrams in the Workwoman’s Guide, 1838
Year: 1838 (this shape remains accurate through the mid 1850s)
Notions: 100% cotton thread, red cotton embroidery floss
How historically accurate is it? I’ll give it 95%. It’s entirely hand-sewn according to mid-19th century plain sewing directions, with attention to specific techniques for shift necklines and gussets from the Workwoman’s Guide and other sources. The construction is as accurate as possible given the width and weave of the modern fabric I had to work with. Because of the fabric, I had to sew and fell the gores onto the bottom of the shift body, whereas if I’d been using proper fabric, I would have sewn them selvedge to selvedge. This time I broke out my 100% cotton thread, along with the beeswax and lots of extra patience.
Hours to complete: Probably about 15. It’s hard to tell when you sew in odd moments, like before breakfast, or while you’re playing dummy at the bridge table…
First worn: This afternoon, to take pictures. It will ultimately figure in a much larger project that is currently stamped TOP SECRET (mostly because I love being dramatic).
Total cost: About $10. I don’t remember exactly how much I paid for the linen, but it was probably about $7 a yard. The cotton thread wasn’t cheap, but I barely made a dent in the spool.
HSF #2: UFO
January 28th, 2013
No, I didn’t sew an alien. In costumer slang, UFO stands for “unfinished object.” And like most historically inclined seamstresses, I’ve got plenty of those laying around. As of tonight though, there’s one less.
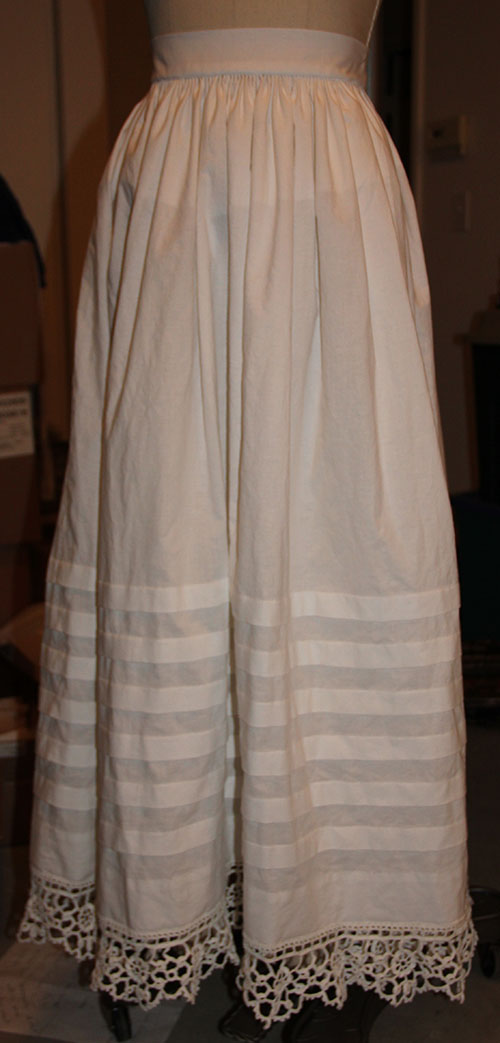
That’s right, it’s a petticoat. I’m predictable. Deal with it.

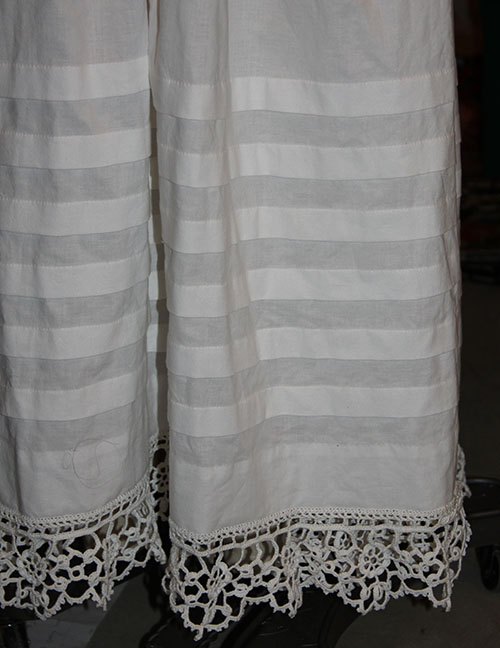
I actually sewed this petticoat a couple years ago. And it’s far from perfect. There’s the whole hem pretending to be a tuck issue. Plus the other two depressingly small and poorly placed tucks. It’s also a little on the short side. Last but not least, it was (until yesterday) missing a waistband.

Just as I learned from the mixed up hem on this petticoat (my next petticoat had 6 generous tucks and a proper hem), I also took a few pointers from a previous petticoat waistband. Before, I used a strip of the same cotton as the petticoat itself. It worked okay, but felt a bit flimsy. I also had to reinforce the area where I sewed the buttons. This time, I decided to borrow a trick I’ve seen on a few extent mid-19th century petticoats and make my waistband out of closely woven linen. Truth be told, I simply cut off the wide hem of an old tablecloth, folded the cut edges in, and whipped it closed. Voila! Perfect linen petticoat band.
Just the facts, Ma’am: Previously unfinished mid-19th century petticoat
The Challenge: #2: UFO
Fabric: 45″ wide cotton muslin (calico), the edge of a linen tablecloth
Pattern: Based on mid-19th century directions and extant garments
Year: 1855 (that’s the year the lace pattern was published in Peterson’s)
Notions: 2 mother of pearl pressed buttons, 135 inches of cotton lace
How historically accurate is it? Let’s say 90%. It’s entirely hand-sewn, with hand-crocheted lace from an 1855 pattern. The construction (minus the hem and tuck issues) is pretty much accurate. I used polyester thread. And the buttons are kinda wrong. They should be milk glass or thread probably.
Hours to complete: Who knows at this point! The lace alone took weeks. The petticoat itself is fairly simple, so probably took under 10 hours. Setting the waistband added another 4 or 5.
First worn: Not yet, not for a while. Still need to make that pesky cage. Which, it turns out, can’t be made until I redo my corset. And you wonder why I’ve got a studio littered with “ufo’s”
Total cost: About $15, counting the muslin and the cotton thread. The buttons were a gift from mom and dad way back in my teens (they gave me a huge bag full from a company that operates an antique button press — more accurate for late Victorian/Edwardian). I don’t recall where I got the cannibalized tablecloth.
HSF #0: Starting Simple
January 2nd, 2013
New year, new petticoat. Yep, I’m still me.
Amid the holiday rush, I managed to find a few hours each day to “zen out” on handsewing. The result, a long overdue petticoat for a swath of 1850s-era “guipure” crochet edging I finished more than a year ago. Why now, you ask? What exactly motivated me to finally get this done?
It was the Historical Sew Fortnightly, organized by The Dreamstress, who is one of my very favorite bloggers even though I’ve never met her (I always feel a bit uneasy reading the blogs of people I don’t actually know — sort of like I am stalking them).
Anyways, the idea is that participants are challenged to sew an historical (pre-1938) garment every two weeks for the next year — 26 in all. Each fortnight has a theme around which to organize your project. And best of all, there’s a bustling Facebook group to share research, inspiration, and lots of delicious pictures of the completed projects! This petticoat is my contribution for challenge #0, the pre-challenge. It’s title was “Starting Simple.” Make something fairly easy, and/or something that you’ve made before.
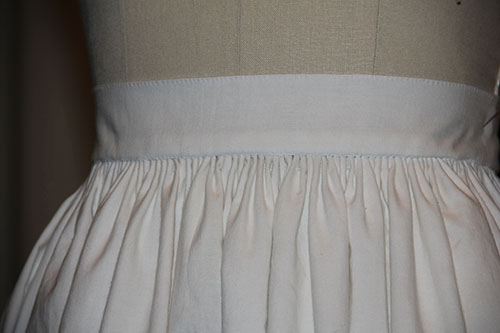
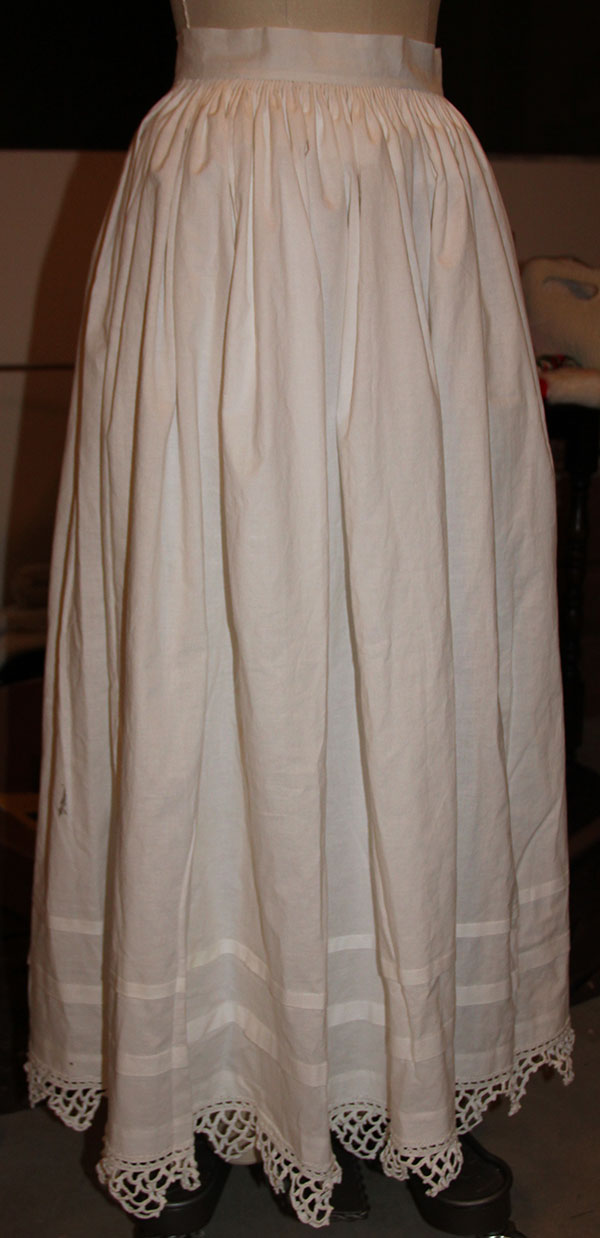
It’s a basic mid-19th century style top-layer petticoat. I used three breadths of 45 inch cotton, sewn up the selvedges and cartridge pleated to a buttoned waistband. Based on this gorgeous example from The Metropolitan Museum, I decided to include 6 tucks above the edging.

As is obvious from the picture of my deflated petticoat at the top of this post, I still need to put my cage crinoline together. I blush to admit I was in such a hurry to finish this, I committed the curatorial sin of using an extant cage crinoline (circa 1860-1865) from my personal collection to balance the petticoat. But I did resist the urge to get it out again for the photograph. I was also too lazy to put on my corset to figure out where to sew the buttons…
Just the facts, Ma’am:
The Challenge: #0 Starting Simple
Fabric: Cotton muslin
Pattern: Based on period directions and extant garments
Year: 1850-56
Notions: 2 mother-of-pearl buttons (I need to learn to make thread buttons!)
How historically accurate is it?About 90%. It’s impossible to get completely accurate materials — for example, the quality and size of the cotton are a little off, and I have a feeling the thread I used for the crocheted edging is the wrong size (it was the right number, but seems a little on the large side). Otherwise, it’s completely hand-sewn with period plain-sewing stitches.
Hours to complete: 20-30. Thanks to those six tucks, I figure I put upwards of 1,200 inches of sewing into this petticoat. Much of it running at 18-stitches-to-the-inch…
First worn: Not for a while yet — I need to finish the cage and/or crinoline, not to mention a whole bunch of other pieces to complete my 1850s wardrobe. This petticoat, along with others, will eventually be part of a mixed-media art exhibit as well.
Total cost: Counting fabric and crochet thread, about $15.
Snap
December 4th, 2012
Moving out of our teensy Greenwich Village garret and into a relatively cavernous cottage on the California coast has been quite the process. Among the great changes: we finally have all of our possessions in one place; no longer are they stashed in other people’s attics and closets. For me, that means a veritable mountain of needlework supplies. Not only my own accumulations from the past decade, but also a fair stash inherited from my grandmother — not to mention a series of generous gifts passed down from friends and neighbors.
Recently, in the midst of negotiating a fantastic bunch of old notions into the antique wardrobe which is temporarily housing my ribbon, lace, and fasteners, I came across these glorious snap cards. Each was holding only one or two metal snaps, and it seemed a waste of space to store them so. Since the vintage snaps are virtually indistinguishable from their modern counterparts (nice to know some things haven’t changed), I consolidated onto a more recent card, leaving these beauties as you see them.
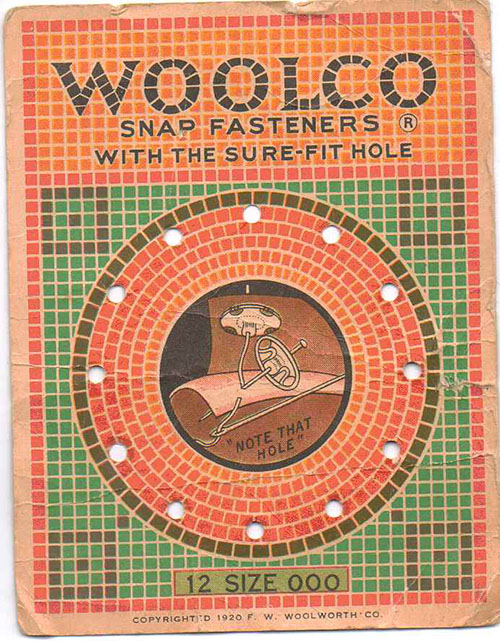

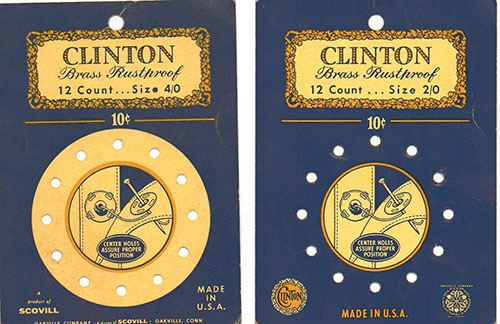
Based on some very cursory research, it seems that metal snap fasteners were introduced in the late 19th century. You certainly see enough of them on early 20th century clothing — and not just casual wear. They are widely used on gowns, dresses, blouses, skirts — anywhere that a hook and eye might have shown up a few decades earlier. Snaps have the added advantage of not requiring tension to keep them closed (like hook and eye fasteners do), so they were well suited to the looser styles that evolved following World War I. They come in a handful of sizes — the smallest being 4-0, recommended for delicate sheer fabrics, like lawn or batiste.
Given my current penchant for armistice blouses (more on that shortly), you can bet I’m digging the snap of late. Plus these gorgeous deco cards!
Aprons, Part 7
May 23rd, 2012
I’m running out of things to say about aprons.
Today’s pairing features stylized flowers — they scream 1950s to me, but they could also be from the 1970s, when 1950s style saw a resurgence (think Happy Days, Grease).
Number one is pretty basic, relying on the printed fabric for decorative effect.

And a more elaborate apron of geometric daisies with red trim and patch pockets.
