Petticoat II
August 20th, 2011
I haven’t assembled my cage crinoline kit yet, so the skirt of my monumental broderie anglaise petticoat continues to languish in the closet. I need the cage — not to mention my new corset — in order to properly fit and balance the petticoat on its waistband.
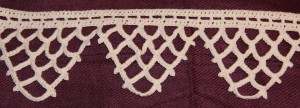
Meanwhile, I’ve begun a crocheted edging for another petticoat. I’m using a pattern from Peterson’s, 1855 (I made a sample of this pattern earlier in the year):

I usually try to avoid crochet patterns that begin “work a chain slightly longer than desired.” I vastly prefer to work one entire repeat at a time, like knitted lace. Unfortunately, most crochet patterns require the header at least to be worked full-length, and this one is no different. After the header and top row of loops though, it’s worked by the repeats. So it could be worse.
It took me about 6 days of fitful work to complete the full-length rows. Now I’m happily hooking away on the fun part. I like to put three breadths of 45 inch cotton into my petticoats — a little narrow for the cage era perhaps, but I need them to be manageable over a horsehair crinoline as well. So, with about 135 inches in my hem, I decided to make 145 inches of edging. I’d rather have to ease the edging onto the hem than the other way round!
I want to get some nice cotton broadcloth (or a nice old sheet) for this petticoat. I’ll definitely tuck it, and have been considering some embroidered inserting, but that may be a bit much…
The real question is, what on earth am I going to do with all these fancy petticoats?
Fait Acompli
July 30th, 2011
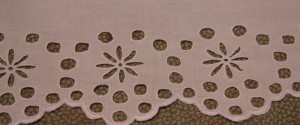
I can hardly believe it, but I have finally finished my broderie anglaise petticoat frill. It’s taken the better part of a year, but it’s really done. Scallops and all. When you add in the months I spent tucking and embroidering the petticoat to which this frill will soon be attached, I’ve spent almost exactly a year and a half on a single petticoat. To be fair, I worked in fits and starts, sometimes ignoring it entirely for 6 weeks. If I was to work steadily, and with the proper materials, I’m sure I would have taken only a fraction of the time.
There’s a great deal wrong with it, but it’s all little technical stuff. Overall, the effect is really rather wonderful (at least to my easily pleased eye) and I can’t wait to see it all put together!
What’s wrong, you ask? Perhaps to avoid pitfalls with your own frills, or maybe you just like to gloat? Well, I’ll tell you. First of all, I wasn’t nearly regular enough in transferring my design. I should have pounced it, or at least taken a bit more care when drawing it on. I also made the circles too small. Then, I used a single thread of standard embroidery floss — made even thinner because it was an off-brand. I should have used real coton a broder, probably in two different sizes for padding and stitching, or at the very least, two strands of the embroidery floss. I might then have made the border round each circle properly thick and glossy.
I’m fairly happy with the scalloped edge though — I used a double strand of floss and it turned out quite nicely. Of course I should have done the bottom row of circles differently, so that they would be more united with the scallops instead of seeming to clash with them. Ah well. There’s always next time.
For now, I have only to put a tiny hem into the top of the frill and sew it under the bottom-most tuck of my petticoat. I haven’t attached the petticoat skirt to a waistband yet. I plan to cartridge pleat it of course, and find some pretty little milk glass buttons for the band. I know tapes would be better, but somehow I just can’t bear the idea of sloppy tapes (tapes are invariably sloppy, no matter how neatly they are arranged) marring my beautiful petticoat.
But before I can fit the skirt for length and balance it, I need my new cage! Yes, at long last I have ordered a cage crinoline kit from Wooded Hamlet. It’s amazing how close they’ve come to matching materials used in actual cage crinolines of the 1850s. But that’s another post entirely…
Also coming up soon — a preview of my someday-to-be-given tell-all lecture on broderie anglaise and its social implications in mid-19th century England & America.
Petticoat Acompli
May 21st, 2011
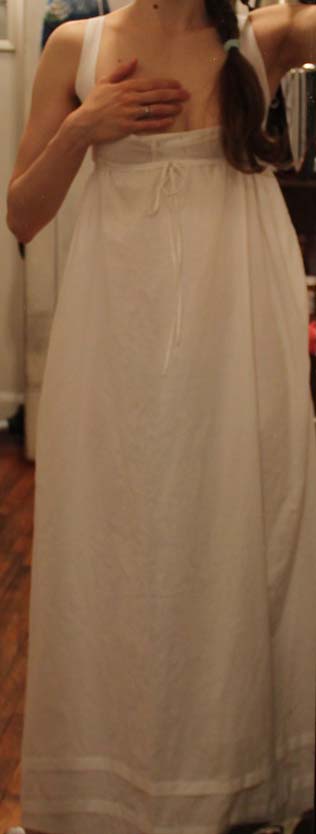
I’m pleased to report that my Empire petticoat is complete! It’s entirely hand-sewn, and despite a skirt that is not quite perfectly balanced, I’m very happy with it!
As revealed in an earlier post, I used a pattern from Janet Arnold’s Patterns of Fashion I: the 1798-1805 morning dress. I simply left off the apron front that would have turned this into a complete dress. The bodice is linen (Arnold’s original had a linen lining to the bodice), but I decided to go with cotton muslin for the skirt — linen would have been far too stiff and heavy.
Here’s the apron part of the skirt — nearly flat at the front, but lightly gathered by the time it reaches the side. It’s set into a very narrow linen waistband that continues to form long ties. The original dress had a front bodice piece attached to this part of the skirt, that buttons on to the rest of the bodice.
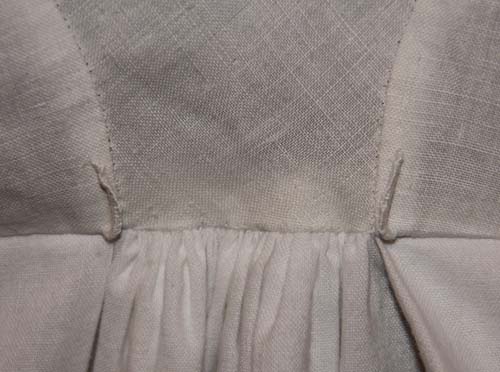
The sides and back of the skirt are set into the bodice with a series of pleats at the sides and a small section of gathers at the very back. Also at the back, you’ll see a pair of thread loops that hold the ties from the apron front as they wrap around to tie in front.
I had to resist the urge to over-finish the inside. After running the seams with a modified back-stitch (tiny running stitches with an occasional back-stitch for strength), I trimmed the allowances and overcast them. The neck, arms, and front bodice were simply turned and hemmed.
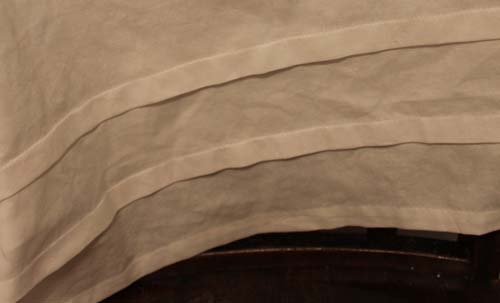
The skirt is two lengths of 45 inch wide cotton muslin, sewed into a tube at the selvedges (19th-century “sewing” requires no seam allowance when you’re joining selvedges). Since the original pattern called for three breadths of narrower fabric in the skirt, it used the side seams for the apron front opening. My side seams were too far towards the back. Instead, I cut two long slits into the front portion of the skirt and hemmed them with a tiny pleat at the base of the slit. I also hemmed the bottom, and put in two 3/4 inch tucks.
At the top of the skirt, I scooped out an inch from the center front, rising gradually as it came around to the sides. In retrospect, I wish I’d taken more than 1 inch — the bodice rises in the back, pulling the skirt up more than I realized. If I’d followed Arnold’s pattern exactly, this would not have been an issue since the back of her dress has a considerable train that would disguise any shortness.
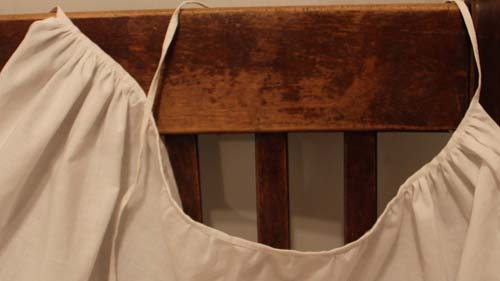
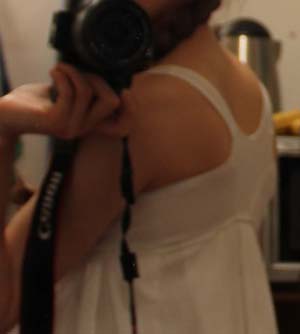
See how it angles up in the back? You can also see how far back the armscye is set. This is one of the distinguishing markers of an Empire gown, though I rather wonder if mine isn’t a bit extreme.
In the end, I decided not to lace up the front the bodice. In Arnold’s original pattern, she indicates that the bodice lining is simply pinned closed. During the fittings, I was convinced that pins would never hold (the lining provides all the bosom support for this outfit) and that I’d be in constant danger of being stabbed. When I tried it on this morning though, pinned in place, I realized that it really works! So I’m leaving it with pins.
And yes, though cleverly disguised in order to keep this picture viewable, the bodice does not come up high enough to actually cover the bosom. As seen in this picture of the original painting that I’m using for inspiration, the lining is meant to run underneath, supporting, but not concealing.
Now, on to the dress!
Stitching Away
May 20th, 2011
I haven’t had much sewing time in the past few evenings (thanks in part to a humiliating mishap on Tuesday night), but I’m still making steady progress on the petticoat for my Empire gown. Keeping me company, I’ve got everything a girl could ask for: Yesterday USA internet radio, a handsome husband in the easy chair, and my wee sewing bird.

Crochet Edging
January 17th, 2011
Here’s another edging, recommended for petticoats, from Peterson’s, 1855.

The pattern was remarkably well written and easy to follow, especially with the clear and accurate illustration. I still haven’t figured out how to gauge sizes on 19th-century cotton, but I’ve found some patterns for very fine tatted lace that call for no. 20 or 30 boar’s-head cotton, and directions for a coverlet calling for no. 10. So I am going to presume that, like today, the higher size numbers indicate finer thread. This pattern bears that out as well, asking no. 10 for a petticoat trim, but 16 or 20 for a child’s drawers.
I used what I had on hand to make up a sample — modern no. 16 cotton and a 1.3 mm hook. I don’t think I’d want to trim a petticoat with anything thicker than a modern no. 16; this is a pretty edging, but a bit on the stiff side already. It does seem strong, which was a frequently stated prerequisite for any undergarment trimming (they boiled their laundry, then it was wrung out, and finally put it through a mangle).
Best of all, even though it is worked over the full required length for the first four rows, it does work up relatively quickly. I wouldn’t mind making 100 or so inches of this to trim a petticoat. Someday.
« Newer Posts — Older Posts »

