HSF #3: Under it All
May 14th, 2013
Boy is this a belated post. The deadline for this challenge was February 11. That’s MONTHS ago. Oops. But here it is in the spirit of better late than never (when you try to juggle as many things as I do, this becomes one of your favorite phrases)…
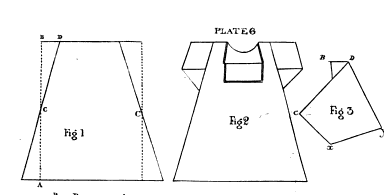
I made a early-mid-19th century shift exactly by the book. That is, following the directions in the Workwoman’s Guide (1838) to the letter. I mostly used the written directions and measurement charts, but it’s nice to have illustrations for reference as well, like plate 6, shown here. Don’t worry if you can’t find the illustrations when you read the Guide on Google Books — they’re all at the end.
After a little hesitating, I decided to break into my stash of NYC linen. I selected a piece with a fairly loose weave — not at all historically accurate, especially since the warp is made of much tinier threads, throwing the balance completely off. But it seemed like the best approximation of the “stout linen” recommended for shifts “for poor children.” (I realize that makes no sense at the moment, but I’ll explain what I’m working on eventually.)

The fabric was 60 inches wide, give or take a few after I shrunk it twice, so I was able to cut it in half and scrape out enough to make two shifts in the “first size” (aka smallest) with a single length. I cut it “to a thread,” which is the laborious process of pulling out a thread and cutting along the empty line to make sure you stay on grain — alas, linen cannot be torn like cotton. Then folded my length of fabric at the shoulder and basted up the selvedges so they’d stay together as I cut off the gores (see figure 1).

I was reminded how tricky gussets can be when you’re sewing and felling. I’ll admit here that I completely messed up the first sleeve. A quick refresher from a selection of mid-19th century sewing manuals helped me get the second sleeve nearly perfect.

Once I’d cut out all the pieces — which was pretty easy since they were just rectangles — it went together very quickly. The edges were simply hemmed, with the exception of the neckline, which got double-turned and sewn for extra strength.

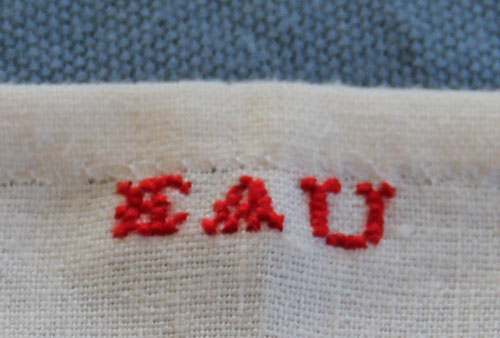
I forced myself to mark the shift at the back neckline with red embroidery thread. Workwoman’s Guide doesn’t mention ink in its section on marking, so I gritted my teeth and made with the magnifying glass. I opted for only my initials since using the current year would look funny, and it didn’t feel right to lie about the year either. I mean, with all that hand-sewing and accurate construction, it might get mistaken for an antique, right?
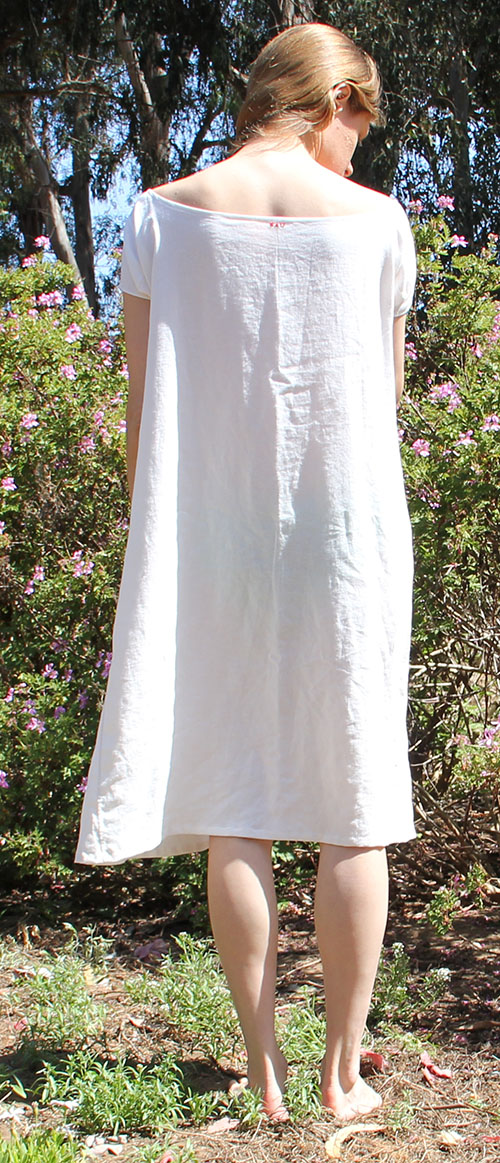
I was a little nervous about making the smallest size. I mean, I may be fairly trim for a 21st, century person, but I’m also half a foot taller than the average woman of 1850 and probably have a bigger — or at least longer — bone structure overall. I did end up adding 4 inches to the length, figuring that’s about how much extra length is in the part of my body covered by the shift. To my surprise, the shift is actually quite roomy. With the exception of the sleeves, which JUST fit my not-particularly-muscular upper arms.

The neckline is especially large. At first I thought I’d made a mistake. But my measurements were perfect. And then I thought there might be a drawstring coming later on in the directions. But nix on that as well. So I am left with three possibilities.
- Women in the mid-19th century were universally better endowed than myself (which isn’t surprising considering what I’ve noticed in the early 21st century).
- They made all their clothes really big because repeated washday boilings were bound to shrink them considerably.
- It’s time to reevaluate the way I interpret “fit” of historic undergarments.
Number 3, while it may seem unlikely, and definitely involves eating at least a sliver of humble pie, does fit with my experience recreating the Regency apron-front dress from Janet Arnold’s Patterns of Fashion I. It’s also supported by some of the paintings I’ve been working from for my latest project. And here I thought the artists were being salacious by portraying women with their shifts falling off their shoulders. But maybe they just slipped on their own…

Just the facts, Ma’am: Workwoman’s Guide Shift
The Challenge: #3: Under It All
Fabric: 60″ wide hopelessly modern linen with an unbalanced weave
Pattern: From the written directions and diagrams in the Workwoman’s Guide, 1838
Year: 1838 (this shape remains accurate through the mid 1850s)
Notions: 100% cotton thread, red cotton embroidery floss
How historically accurate is it? I’ll give it 95%. It’s entirely hand-sewn according to mid-19th century plain sewing directions, with attention to specific techniques for shift necklines and gussets from the Workwoman’s Guide and other sources. The construction is as accurate as possible given the width and weave of the modern fabric I had to work with. Because of the fabric, I had to sew and fell the gores onto the bottom of the shift body, whereas if I’d been using proper fabric, I would have sewn them selvedge to selvedge. This time I broke out my 100% cotton thread, along with the beeswax and lots of extra patience.
Hours to complete: Probably about 15. It’s hard to tell when you sew in odd moments, like before breakfast, or while you’re playing dummy at the bridge table…
First worn: This afternoon, to take pictures. It will ultimately figure in a much larger project that is currently stamped TOP SECRET (mostly because I love being dramatic).
Total cost: About $10. I don’t remember exactly how much I paid for the linen, but it was probably about $7 a yard. The cotton thread wasn’t cheap, but I barely made a dent in the spool.
