Time to Try Again
March 12th, 2011
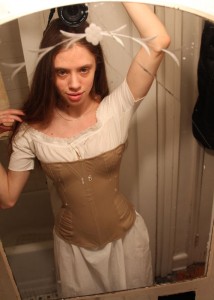
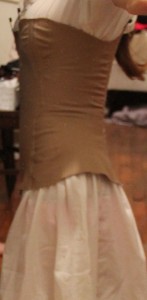
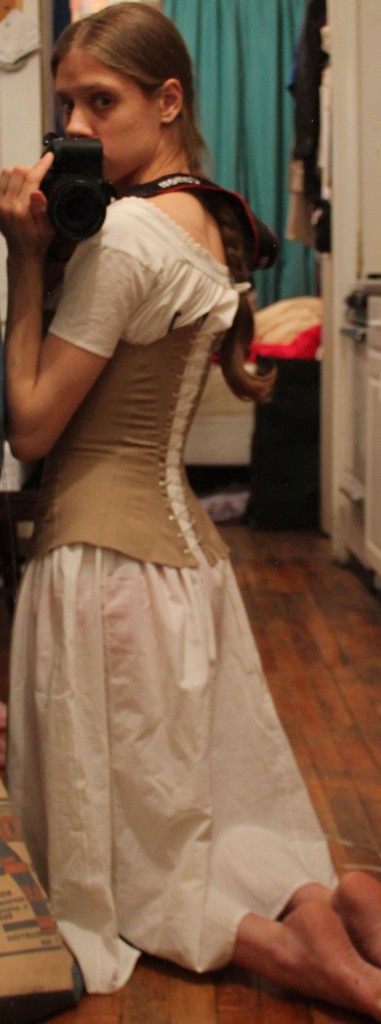
It’s official. My stays are an utter failure.
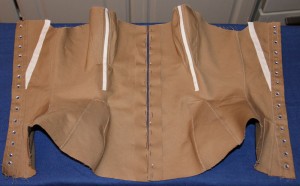
I wore them for 30 minutes last night, and though they were not at all uncomfortable, it was crystal clear that they don’t quite fit. The pattern still needs to be tweaked — I measured the corrections while I had the stays on, and marked up my paper pattern in red for the next go-round. I am planning the following changes:
- Reduce back piece 3/4 of an inch at the bottom, creating more of a sloping shape from the hip (as originally shown on the pattern)
- Move bosom gores 1 inch towards the center
- Move front hip gores towards the center, and angled in the opposite direction
- Eliminate side bones (not in the original pattern, and already taken out of my first mock-up because they pinched terribly)
- Make the buttonholes at the bottom of each bone place on the INSIDE of the stays
I like the idea of a pair of long front bones, sloping from the bosom gores to the busk at the bottom, to help form that early 50s point. I’ve seen it in other stays of the period, but it’s not in this pattern, so perhaps I will leave them out for now. I do need to find a wider busk though. It should be closer to 2 inches instead of 1/2 an inch!
I also intend to make my next mock up of firmer fabric, and sew them by machine. Not that I regret the hours of hand sewing I’ve poured into my first set of stays — I worked out a lot of kinks in the process (and know what I’ll do differently next time) — but I want to get this pattern perfected quickly so as to begin on a real pair of serviceable stays as soon as possible. I’d also like a pair of silken stays too…though don’t know for sure if they even existed in the 1850s.
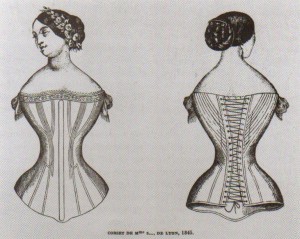
With a nod to The Dreamstress, one of my favorite costume historian bloggers, here’s an images from the Met’s Collection Database that seems close to what I’m shooting for, if not exactly the same pattern:

May the god of costume blogs strike me dead for pointing this to an existing URL instead of a picture on my own server…I’m not sure which is worse, stealing images or stealing bandwidth? Tell me if I made the wrong choice.
Almost, Almost
March 2nd, 2011
I’m pleased to report that I’ve bound my stays, and made a little buttonhole at the bottom of each stay place. All that’s left now is the flossing. It’s a great relief to be nearly finished with these — they’ve been quite a long time coming. However there are so many things wrong with them — I’m eager to start my next pair already. Most of the deficits are the result of imperfect materials.
The fabric (even though it came in a corset kit) isn’t quite right, being a single directional twill instead of a true coutil, and it’s too light to even qualify as fine jean. It probably would have been fine for a double layer corset, but it’s just not strong enough for unlined stays. The busk is all wrong. It’s too narrow, two floppy (even though I used two thick steel bones), and too long. I am now convinced that I need to do a little more research and then have a busk custom made. The metal eyelets for the lacing should be bone or ivory (French holes), though I don’t really see where I am to get those. Perhaps, if I can’t find evidence that metal eyelets were available in the 1850s, I will have to work them by hand in the future.
As for fit, I will know more once I’ve worn them for a while. Right off the bat, I think I need to make the back hip gores a little smaller. The bust may or may not need to be enlarged slightly. I’m also not too sure about the side bones. They weren’t in the original pattern, and they were pinching a bit last night. Luckily I can slide them in and out right now, so will try both ways.
About being able to slide the bones in and out…I think that’s a marvelous feature, and one I haven’t seen on any modern corset patterns. It makes some form of flossing (functional embroidery to hold the bones in place) mandatory however. The pattern suggests drilling a hole in each end of the bones and actually sewing through it, over the end of the bone. However I don’t have a jeweler’s drill yet, so I think I am going to go with later flossing patterns, which merely criss-cross the bone rather than sewing straight through it. I guess they must date from the point when bones became steel.
And that’s all that’s left to do. So I’m off to floss and then to wear it around for a while. Or maybe vice versa, in case I want to remove the side bones after all.
Fits & Puckers
February 2nd, 2011
I continue to make slow but steady progress on my stays. Last weekend I finished hemming in the stay tape (where it was indicated on the 1855/1857 pattern) and sewing a self-fabric busk casing (because I was too lazy to go uptown for 3/4″ webbing). I filled the channels with my zip ties, pinned the busk in place, and laced it up
The fit is very promising, but there are still a few issues. Mostly the problems are with my materials. I’m using plain twill fabric that came with a corset kit I never made, and it’s far too flimsy for single layer stays. I think that’s (partly) why it’s puckering around the gores. Also, the 1/2″ steel bone I bought to fill in until I can get someone to make me a real busk is way too flexible. It looked like I was wearing a spoon busk! Corsetmaking.com sells an extra thick boning that may do the trick. I need to order laces anyway, so I’ll give it a try.
I’m also going to put in some more full-length bones in hope that they will eliminate some of the worst puckers. As written, the pattern only has full-length support at the center front (busk) and flanking the lacing holes. I am hemming in tapes for side bones as I write. And if they don’t do the trick, I may also put full-length bones next to the existing half-bone between the bust gores, as shown in this 1845 French ad:
Going back to the fabric again, I think I will swallow my reluctance to pay $30 a yard for cotton fabric and purchase some real coutil for my next single layer stays. I’m also anxious to try a double layer version, as described in the Workwoman’s Guide. An added advantage to two layers — you can strengthen areas that don’t quite need boning with cords!
Regardless, I am actually very happy with the pattern and look forward to having a pair of working stays so that I can start fitting some actual dresses. I can’t believe I was worried about having too much spring though…these will lace nearly closed if I tug at them, taking my waist down to 24 inches instead of the planned 25. Eek!
P.S. There are now a couple of tiny blood stains on the front of the stays, where I tore my fingers on the pin holding in the busk. Just in case you wanted to know absolutely everything.
For Want of Webbing
January 22nd, 2011
My new stays are on hold again. This time, I’m waiting for 16 inches of 3/4 inch webbing to encase the busk. I’ve finished re-setting the stomach gores (now twice as large as before) and hemming down as many of the bone casings as I can without placing the busk.
Once I get some webbing, I’ll be able to sew the center seam and position the tapes for the little diagonal bones at the top of the center front. The next step is to bind the top and bottom and make holes for the bones. But before I get to that, I want to put all the bones in temporarily and lace it up. The instructions don’t show side bones of any kind, but there are indications from other sources that side bones were pretty common. I want to see how they fit as written — without side bones — before I commit.
I also have to buy corset lacing. Wherever I go for the webbing, I’m sure they’ll also carry lacing. I guess I could go uptown today and acquire the supplies. But it snowed yesterday and the streets are still gloppy. And the temperature dipped well below freezing and promises to remain so through the weekend.
So I think I will stay in my cozy apartment (where a big casserole of made-from-scratch macaroni and cheese is bubbling merrily in the oven) and work on something else. Another repeat on my Broderie Anglaise petticoat trim? A pair of serviceable calico undersleeves with matching collar? A new chemise?

P.S. Did you know that Catherine Beecher classified macaroni and cheese as a vegetable in Miss Beecher’s Domestic Receipt Book, 1846? I like the way she thinks.
New Gores
January 19th, 2011
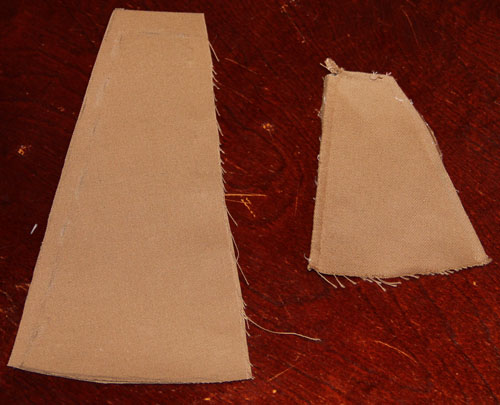
I discovered a few days ago that I’d made the stomach gores on my new stays too short by almost half. I first noticed the discrepancy while staring (for the 100th time) at the pattern illustration. Then, when I tried the half-finished pieces yet again on my own body, it occurred to me that all of the remaining fitting problems would likely be solved by beginning the stomach gores exactly at my waist, rather than over my hip bones.
Look at the difference in size between the old and new gores:
It’s perhaps telling that the only corsets I have made or worn with any success in the past have been in the Grecian Bend model. I used to volunteer at an Edwardian era house museum in northern Delaware (that’s a long story for another day) and so possessed a few appropriate outfits, plus the required undergarments.
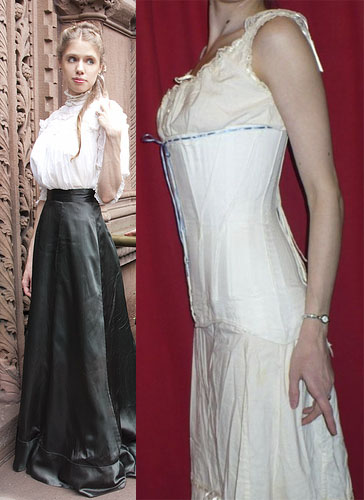
The photo on the left was taken in Brooklyn, not so long ago. I was attending a Neo-Victorian Brunch in full-Edwardian attire with the marvelous Zoh. Photographer Anna Fischer snapped a picture of us standing on the stoop.
According to Wikipedia, the Grecian Bend (originally a dance step) goes back to the late 1860s, when fashionable women began to wear seriously projecting bustles, making them appear to lean forward and stick out their rears. It was also used to describe the posture of people with certain ailments as well as divers who came to the surface too quickly; in their case, the term was later shorted to “the bends.”
I have heard a song whose lyrics repeat “doing the Grecian Bend” on Radio Dismuke, but can’t seem to find the lyrics online. Not surprising, considering how rare most of Dismuke’s playlist is. You will just have to listen to his radio stream for a while and see if you come across it too.
« Newer Posts — Older Posts »
